Content:
- Choosing an engine for a homemade tractor
- What to make a frame from
- What to make a chassis
- Advantages of installing hydraulics
- Making a three-point hitch
- Selection and installation of brakes and clutch
- Installation of steering
- How to make a cabin for a mini tractor
- The nuances of making a caterpillar tractor
- Pros and cons of a homemade mini tractor
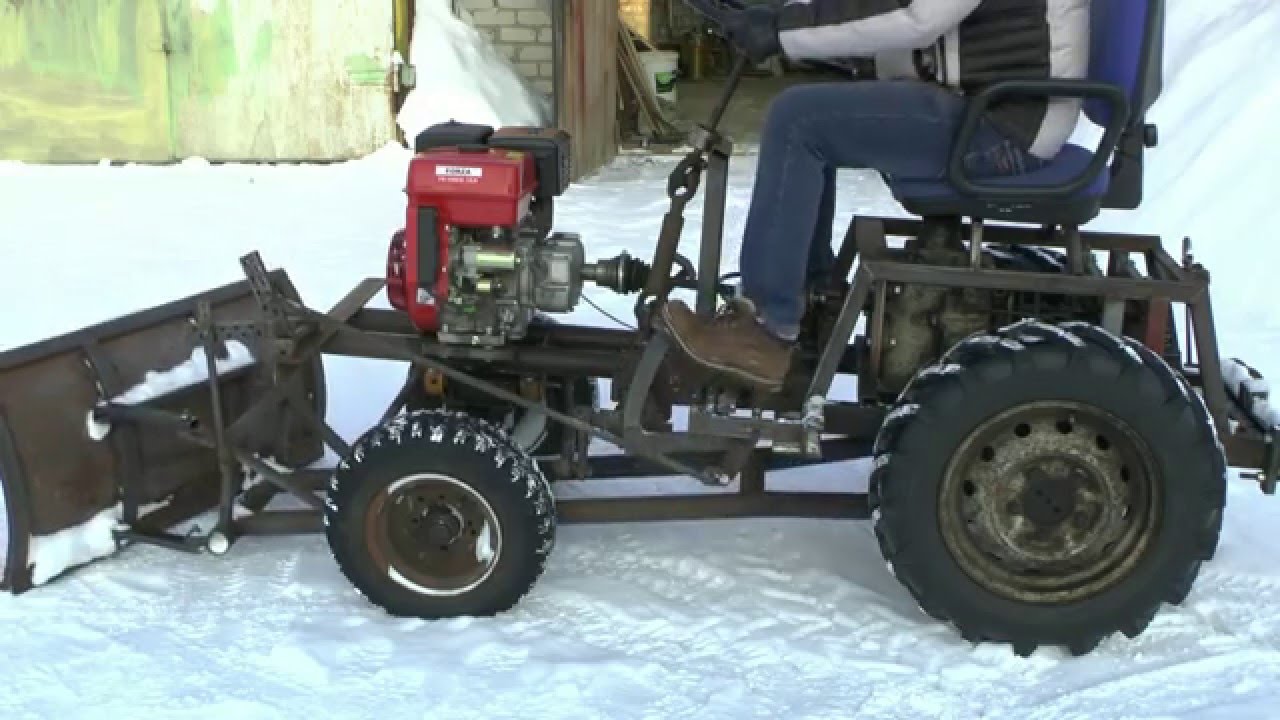
A home-made mini-tractor is not a novelty for a long time, but a convenient and reliable means of small-scale mechanization, which, in comparison with a walk-behind tractor, a motor-cultivator, is capable of performing a wider range of various agricultural works (tillage, haymaking, harvesting) on a personal plot. In addition, a small home mini-tractor will be indispensable for such work as snow removal, garbage removal, transportation of building materials, firewood. At the same time, the manufacture of such a unit does not require, in most cases, significant material costs, the presence of special skills and tools. So, in order to assemble a simple mini-tractor with your own hands, you must have the minimum skills of a welder, have a general idea of the design and principles of operation of automotive components (engine, suspension, transmission, steering, brakes and clutch).
Choosing an engine for a homemade tractor
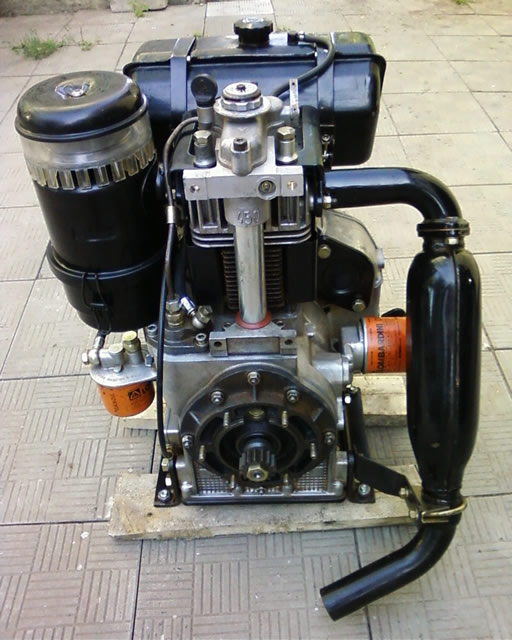
In choosing an engine for a homemade mini tractor, they rely on the following criteria:
- Power - depending on the scope of work and the purpose of the mini tractor, engines with a capacity of 4-5 hp are used for it. (small household plot) up to 50-60 hp (for large fields with an area of over 1-2 hectares);
- Fuel type - power units from domestic cars that run on A-80 gasoline are more convenient and economical. Such engines, in contrast to diesel ones, are lighter, more convenient and easy to operate and repair.
- Maintainability - the installed power unit must be self-repairable;
- Cooling - air or water. At the same time, the first type of cooling is more economical, convenient, it does not require the installation of a liquid heat removal system (radiator, pipes), periodic acquisition of coolant. At the same time, air cooling is ineffective on powerful (over 15 hp) engines; the units equipped with it have a high level of noise, more often they overheat under heavy loads.
Based on these requirements, as a power unit for a mini tractor used for large volumes of work, use powerful liquid-cooled engines from passenger cars such as:
- Oka - a four-stroke, two-cylinder in-line engine with a volume of 0.649 liters, a capacity of 29.3 hp;
- Vaz 2101 is a four-stroke four-cylinder in-line engine with a volume of 1.2 liters and a power of 64 hp.
Minitractors for small and medium-sized work use such less powerful air-cooled power units:
- UD-25 – four-stroke two-cylinder engine with a volume of 0.49 liters and a capacity of 12 hp;
- ZID-4.5 is a single-cylinder four-stroke engine with a volume of 0.52 liters and a power of 4.5 hp.
What to make a frame from
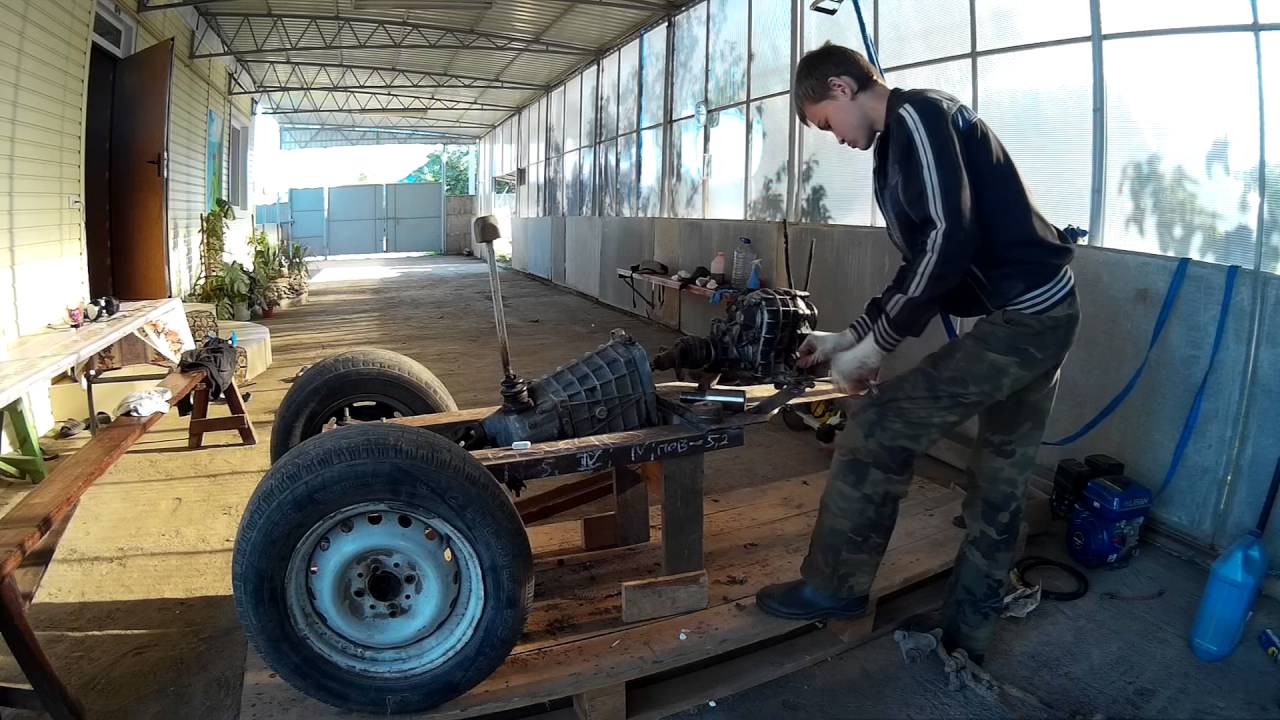
The frame of a home-made minitractor is made of a rectangular shaped pipe 80-100 mm wide, of the same size of the channel by welding its longitudinal components (spars) with transverse bridges (amplifiers). RThe size and type of this design depend on the dimensions of the engine, the location of the gearbox, the number of driving axles:
- For rear-wheel drive home-made tractors, the frame is an all-welded rectangular structure of 2 spars and 2-3 transverse amplifiers. In this case, the front part of the frame has a rise of 10-15 cm relative to the rest of the frame.
- For a homemade all-wheel drive minitractor, the frame is made in the form of two pieces of a square shape, connected to each other using a special hinge or cardan from a truck. Such a fragile mini-tractor, in comparison with a non-drive one, will have not only higher cross-country ability, but also maneuverability.
What to make a chassis
The process of assembling the undercarriage of the most common rear-wheel drive minitractor includes the manufacture of a front beam and a rear axle.
The front beam is made as follows:
- A piece with a length equal to the width of the future track of the tractor is cut from a long profile rectangular pipe with a section of 80 mm;
- 2 U-shaped levers with slots and holes for fastening ball bearings in the upper and lower parts are welded from channel No. 8 (width 80 mm);
- Levers are welded to the ends of the beam;
- Steering fists with hubs from a VAZ, Oka or other passenger car are inserted into the levers;
- The steering knuckles are fixed on the front beam using ball bearings;
- In the middle of the beam, a cross is installed to attach the suspension to the frame. Such a cross is welded from two corners of 40 × 40 mm. Connect it to the beam using a long bolt inserted into the lugs fixed on the outer surface of the welded corners and the upper part of the beam.
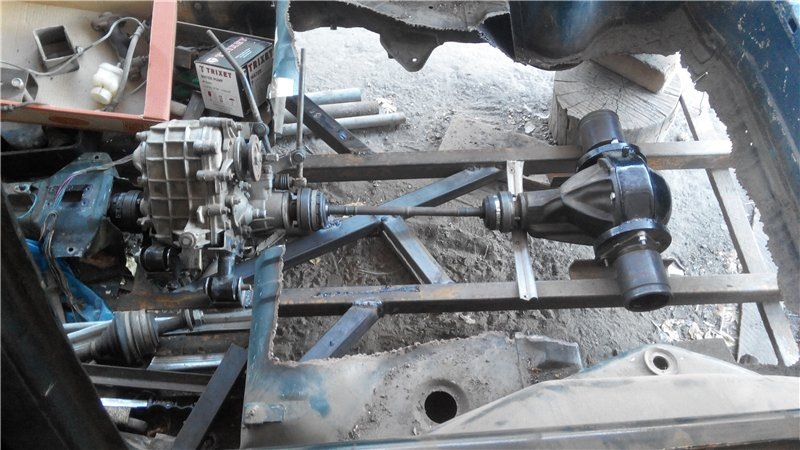
The drive of the wheels of the mini tractor is carried out using a shortened rear axle from the Volga, Moskvich or Zhiguli. Before shortening the Zhiguli bridge to a mini tractor, it is necessary to remove all elements and axle shafts from it. Then the bridge body is cut from both sides to the required length using a grinder.
The most important process of modernizing an axle for a homemade tractor is cutting splines on the axle shafts for the gears of the transmission mechanism. This requires:
- Cut off the ends of the spline shafts;
- Weld the tip of the semiaxis with splines from a remote area at several points ("grab") to the end of the shortened working semiaxis;
- Using a grinder and discs with a thickness (0.8; 1.6 mm), cut the slots into the remaining parts of the semi-axle;
- Carefully break off the old tip with the slots, put the gear on the new splines, checking the absence of scoring and backlash.
After all the operations described above, the transmission mechanism is reassembled, support pads with pins are welded to the upper part of the bridge for fastening the frame.
Advantages of installing hydraulics
The hydraulics of a mini tractor, consisting of an oil tank, pump, distributor and working cylinder, has such advantages as:
- Improving the functionality of the unit - a mini tractor with installed hydraulics allows the use of heavy and wide-range attachments;
- Mobility and maneuverability - thanks to the controlled change in the position of the equipment, hydraulics allows you to control the process of soil cultivation without leaving the cab;
- Precision Adjustments - Hydraulics make adjusting attachments more accurate and convenient.
The main elements of hydraulics - a pump and an oil tank, are installed in the front of the minitractor. The control handle is located in the cab near the seat or steering wheel. The hydraulic cylinder is mounted at the rear of the tractor and controls the three-point suspension
Making a three-point hitch
The classic version of the three-point linkage is a mechanism consisting of two lower levers located on one common shaft, and a central screw fixed between them above. Each of the levers includes:
- Cheek with a hinge;
- Vertical thrust;
- Braces.
To raise and lower the hitch, the vertical rods of the lower levers are attached to a movable U-shaped fork, operated manually or using a hydraulic cylinder.
Such a hitch is made using steering rods from a GAZ-52 truck as the lower levers and their rods. The fork is welded from a corner with a cross section of 40 × 40 mm. A bar of solid structural or tool steel is used as the axis of the lower levers.
Selection and installation of brakes and clutch
The brakes on rear-wheel drive mini tractors are installed on the rear wheels. For this, a ready-made brake system of a passenger car is used. So, for example, the drum brake system differs from the Zhiguli in reliability and ease of operation and repair. Its main cylinder is installed in the front of the minitractor, connected by a rod to a pedal in the cab. The wheel brake cylinders are connected to the master cylinder using copper or metal pipes with fittings at the end.
The clutches together with the pedal and cables, hydraulic drive as well as the brakes are easier to take together with the working engine from an old disassembled car. Best of all, a clutch from a Moskvich 2140 or 2141 car is suitable for this.
Installation of steering
When assembling a home-made tractor, a rack and pinion steering mechanism is used, consisting of a steering wheel, a cardan, a rack and pinion mechanism, steering rods with tips.
Installation of the steering of a minitractor using the example of a rack and pinion mechanism from an Oka car consists of the following stages:
- Fixation to the front beam of standard fasteners for rack and pinion;
- Fastening the rack and pinion mechanism to the front beam;
- Installation on a steering wheel frame with a steering column;
- Connection of the steering wheel to the rack and pinion gearbox using 1-2 cardan steering shafts;
- The connection of the rack and pinion mechanism with the steering knuckles of the wheels using the tips installed at the ends of the steering rods.
After installation, a check is made of the eversion of the wheels and the absence of play in the rotation of the steering wheel.
How to make a cabin for a mini tractor
In order for the operation of the mini-tractor in the cold season to be comfortable and not harm the driver's health, a glazed and insulated cab is installed on it. They make it independently as follows:
- On paper or with the help of a computer program, a visual drawing of all elements of the cabin is drawn up;
- Before assembling a mini-tractor cabin from bars, make its full-size model. This is to test the comfort of the cab for the driver before assembling it from metal components.
- Cutting of the cabin frame elements from the metal corner;
- Connection by welding of parts of the cab frame;
- Assembly of the door and its fastening to the cab;
- Installation of a handle and lock on the door;
- Welding of metal sheets on the sidewalls, the roof of the cab;
- Installation of the cab on the frame;
- Fastening the cab to the frame by welding or bolting;
- Cab and driver's door glazing. At the same time, the glass is fastened with a durable two-component adhesive and sanitary silicone sealant.
- Mounting on both sides of the cab rear-view mirrors;
- Insulation of the cabin from the inside;
- Installation in the driver's seat.
The nuances of making a caterpillar tractor
Many, not knowing how to make a caterpillar mini tractor, say that this is impossible. However, this is not at all the case; you can make this kind of unit as follows:
- Similarly, as described, the frame and chassis are manufactured;
- A diesel engine from a walk-behind tractor or a truck (ZIL), a bus (Luaz, Paz) is used as a power unit;
- In order to make tracks, a sidewall is cut out in a circle at the rear tire from the MTZ-82 tractor, after which the remaining protector is easily pulled onto the wheels mounted on the chassis;
- In order for the mini tractor to turn onto the rear axle, a differential is installed, which, if necessary, could turn off one of the drive wheels.
Pros and cons of a homemade mini tractor
A homemade mini tractor assembled from scrap materials has both advantages and disadvantages.
Among the advantages of a self-made homemade mini tractor are:
- Ease of manufacture - such a unit can be assembled by anyone with the minimum skills of a car mechanic and a welder;
- Low material costs for assembly - if such a technique is needed on the farm, and there is nothing to buy a factory analogue, then there is nothing easier and cheaper than making such a mini-tractor from old Zhiguli or another old own car.
- Availability of spare parts - they make such equipment using spare parts from disassembled Soviet and domestic passenger cars (Lifan, Vaz, Oka), scooters, motor-blocks as materials. Thanks to this, the cost of purchasing components for a mini tractor is minimal.
- Maintainability - a mini tractor made of simple equipment units can be repaired without much difficulty without resorting to the services of auto mechanics and other expensive specialists. So, even if the engine fails, it can be quickly and easily changed to a new one.
The disadvantages should be highlighted:
- The obligatory presence of the skills of a welder and a minimum knowledge of automotive technology is that important condition, without which both the assembly and further operation of such equipment is practically impossible;
- Rigidity and lack of shock absorbers - as a rule, the assembled mini-tractor does not have shock absorbers, which is why during driving and performing some types of work, excessive vibration is well transmitted through the suspension to the frame. This leads to discomfort for the driver of the mini tractor and his fatigue during work.
- High noise level - if you make a mini-tractor using an air-cooled engine as a power unit, the noise it creates at high speeds will significantly tire the driver's hearing during a number of works.
Thus, a mini tractor is a reliable and simple unit that can be assembled by almost every modern peasant from improvised material and components that have become unusable old cars. With a competent and thoughtful manufacture, it will not only not be inferior to factory counterparts, but also surpass them in the breadth of work performed by it in the agricultural sector. Controlling a mini tractor can be mastered not only by its owner, but also by all his household.
