Content:
Hosta is a flower that has gained great popularity among gardeners. Its distinguishing feature is that it attracts not with its flowers, but with the shape and beauty of the leaves. Experts divide the varieties of this culture according to several parameters. The size and color of the leaves are considered the main ones. They range in size from the smallest, potted flowers to huge plants. The color of the leaves can also vary.
Growing hosts in a pot at home and outdoors
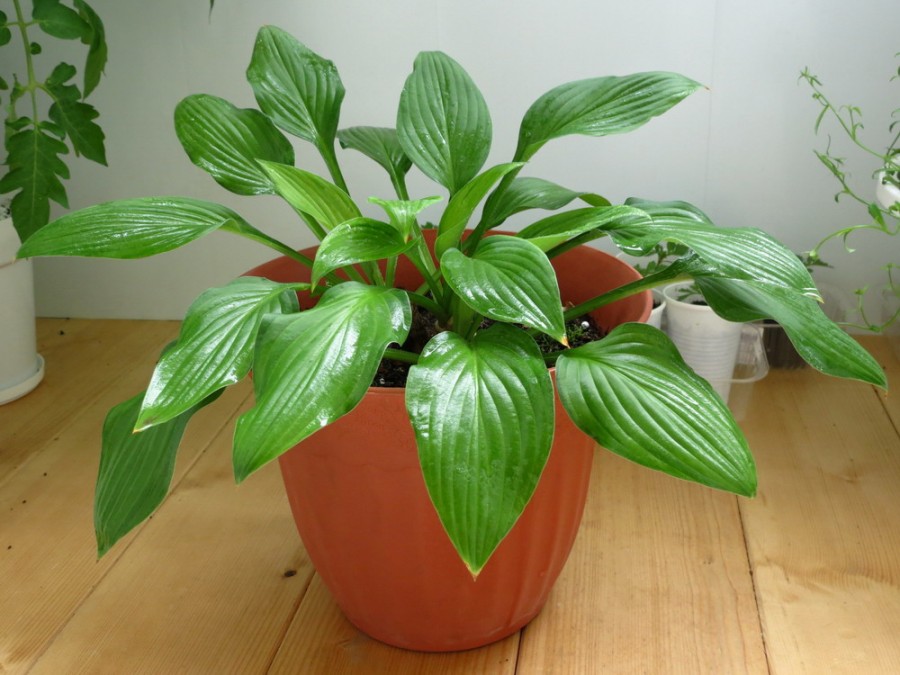
Many gardeners argue whether the host can grow in a pot at home. Opinions differ - some believe that this flower should only be grown outdoors. There are those who believe that a potted hosta makes sense too. Many even prefer to grow the hosta outdoors in pots.
Is it possible to grow a host in an apartment
Growing hosts at home has its own specifics:
- It is necessary to select medium-sized indoor varieties of this plant so that the hosta in the pot feels good.
- In order for the plant to develop as it needs, some advise to remove the flower in the basement. The temperature there should be low enough, but not lower than + 2 ° С. The idea behind this is to simulate the situation in which a plant would find itself on the street. This will help the natural life phases of the flower.
- The plant does not like direct sunlight, so you need to make sure that the place where the pot stands is somewhat darkened. However, you should periodically move it to lighter areas.
- If the newly acquired flower is in a container and is not yet strong enough, then it is better to postpone the process of transplanting into a new pot until the root system develops and becomes more powerful.
- In order for a flower in a pot to retain its shape better, experts recommend removing the peduncles. In addition, it is important to separate young cuttings from the root in time and transplant them to a new place.
Hosta from seed in a pot at home
To plant the hosta and care for it at home in a pot, you need to follow the following step-by-step description of actions.
Seed preparation
The first step is to properly collect the seeds and prepare them for planting. They appear approximately 2 months after pollination. They can be collected when the box turns brown and opens. The resulting seeds should be carefully prepared for future planting. For these purposes, they are slightly dried, cleaned of excess. In addition, in order to temper them a little and improve the future germination process, after drying, they are placed in the refrigerator for a month. Some people advise placing the seeds for 30 minutes before planting. in aloe juice, root, epin or other growth stimulants.
The soil
Before you start sowing seeds, the soil should be well prepared. A sterile substrate is suitable for this. It should not contain any harmful microorganisms and fungi, as this may affect the future of the plant. This mixture may include peat, perlite and vermiculite. Many recommend buying a ready-made substrate in a store, as this gives a guarantee that all the necessary parameters are met.
Preparing the pot
For this culture, a properly selected and prepared pot is of great importance.A plastic pot with small holes in the bottom works well. It must first be disinfected and treated against harmful microorganisms. For this purpose, alcohol or potassium permanganate is usually used. You need to wipe the pot with them, after which you can start sowing seeds.
Planting seeds
After preparing the seed and pot, you can start sowing:
- Place a drain on the bottom of the container.
- Water the substrate, slightly moistening it.
- Place the moistened substrate at the bottom of the vessel.
- Sprinkle seeds previously soaked in a growth promoter or hardened into a plastic container and cover with a small layer of earth from the same container. The soil layer with which the seeds are covered should not be thicker than one centimeter. Then you can not tamp the earth too much so that moisture is better preserved.
- In order for moisture to be well preserved, the pot must be covered. A bag, glass jar, or plastic bottle will work.
- Put it in a dark, warm place - temperature 18-25 ° С.
- It is necessary to ensure that excess condensation does not accumulate, the soil is sufficiently moist.
Dive
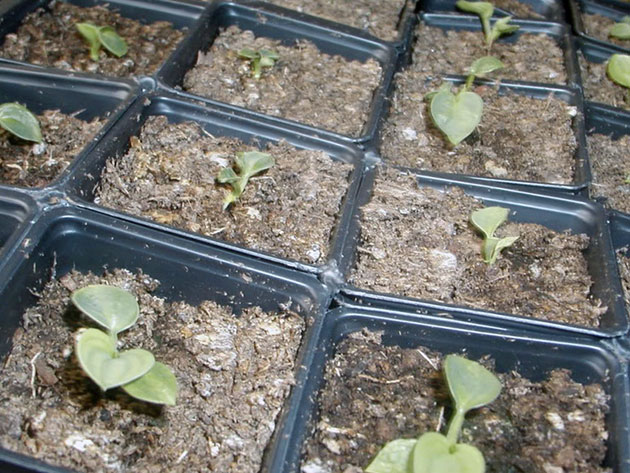
If all the necessary conditions are met, then the seedlings of the hosts appear in 2-3 weeks.
After the first shoots have appeared, you need to rearrange the seedlings in a brighter place. When the first pair of leaves appears, the seedlings can be transplanted into separate pots. To do this, take a vessel with holes in the bottom and place a drain on the bottom, then put a layer of soil.
Ready-made primer can be purchased at the store. Pour sifted sand on top. After the seedlings are transplanted into separate containers, the flower should be watered with bottom watering. To do this, the pots are installed on a special tray, into which at the time of watering you need to pour water, then wait for the soil to be moistened.
The host at home needs to be tempered, so if the weather is not very cold outside, then it must be done. To do this, you need to take the pot out of the room for 1-2 hours to the street and remove the film. The air temperature must be at least 18 ° C.
Growing hosts in a pot on the street
While outdoor-grown hosta is preferred by many outdoors, cultivating this potted plant outdoors has its own supporters.
The positive aspects of this method include:
- Faster plant development.
- The ability to predict in advance quite accurately the place that the flower will take and how it will fit into the overall composition.
- The ability to change the location of the plant at the request of the gardener.
If you ask the question whether it is possible for the host to grow in a pot in an apartment or better on the street, then you will notice that both of these breeding methods take place.
